Process
1. The title of the page: PROJECTS
2. The template:
 |
| the main page of all projects |
 |
| the paging surface of a project |
3. Collecting the picture of projects
I found that those projects I did in this term are from two courses, Digital design and 2D&3D design, so I decided that the page of projects is divided into two main categories.
Then, the title at the top of the page is changed to 'HOME', 'MY STORY', 'DIGITAL DESIGN', '2D&3D DESIGN' and 'CONTACT'.
4. Modifying those project photos
I found that those projects I did in this term are from two courses, Digital design and 2D&3D design, so I decided that the page of projects is divided into two main categories.
Then, the title at the top of the page is changed to 'HOME', 'MY STORY', 'DIGITAL DESIGN', '2D&3D DESIGN' and 'CONTACT'.
Next, I collected my projects.
 |
| screenshot of DIGITAL DESIGN |
 |
| screenshot of 2D&3D DESIGN |
I modified those photos in PS. For example, modifying the moon cake box size diagram.
 |
| PS operation screenshot of modifying the moon cake box size diagram |
5. Making the main page of all projects
Firstly, I adjusted the template according to the number of all projects.
Then, I chose the best picture for every project.
Next, I added them to the main page of all projects.
Then, I chose the background of this page according to the photos. For example, on the main page of DIGITAL DESIGN, the colour of the background is similar to two pictures, and the whole background colour is hazy to highlight the project photo.
 |
| screenshot of DIGITAL DESIGN |
6. Making the paging surface of every project
Firstly, I added the images to the website according to the template.
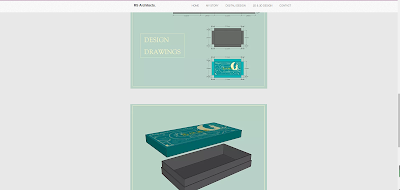
Next, I thought of the text to describe my projects. For example, in the project of mooncake box, I chose the words from the final board of the project.
 |
| screenshot of Mooncake box page |
 |
| screenshot of Mooncake box page |
7. Adjusting the images and text throughout the site.
8. Checking these page.
Background
I'm going to mention some background here that I didn't mention before.
1)Community Centre
I made a picture of fair-faced concrete as the background picture of this project, because the main material of this project is fair-faced concrete. The image was made from a cut from a wall of fair-faced concrete and filled in with paint bucket tools in photoshop.
2)Pen Still Life
3)Recreating Painting
4) Self-portrait
This background painting is a colour lead line drawn by myself, using the same colour as the first picture in this project.
5)Basic Construction
This is painted with wood colour in photoshop with a branching brush, which is very consistent with the colour of this project.
6)3D Sustainable Piece
These four colours are from Mondrian, and the colours of my project are also borrowed from these colours.


ReplyDeletePlease make sure you proofread your work as there are a number of spelling and grammar mistakes in your menu bar and project introduction. Make sure you add reflection on your final outcome. How do you feel about the design of the portfolio pages? What works well? How could it be improved?
There is very little research throughout your blog that shows you have looked at other website designs and considered this in relation to your own work. It would be best to develop this and add research with critical commentary on how this informs your own work.